
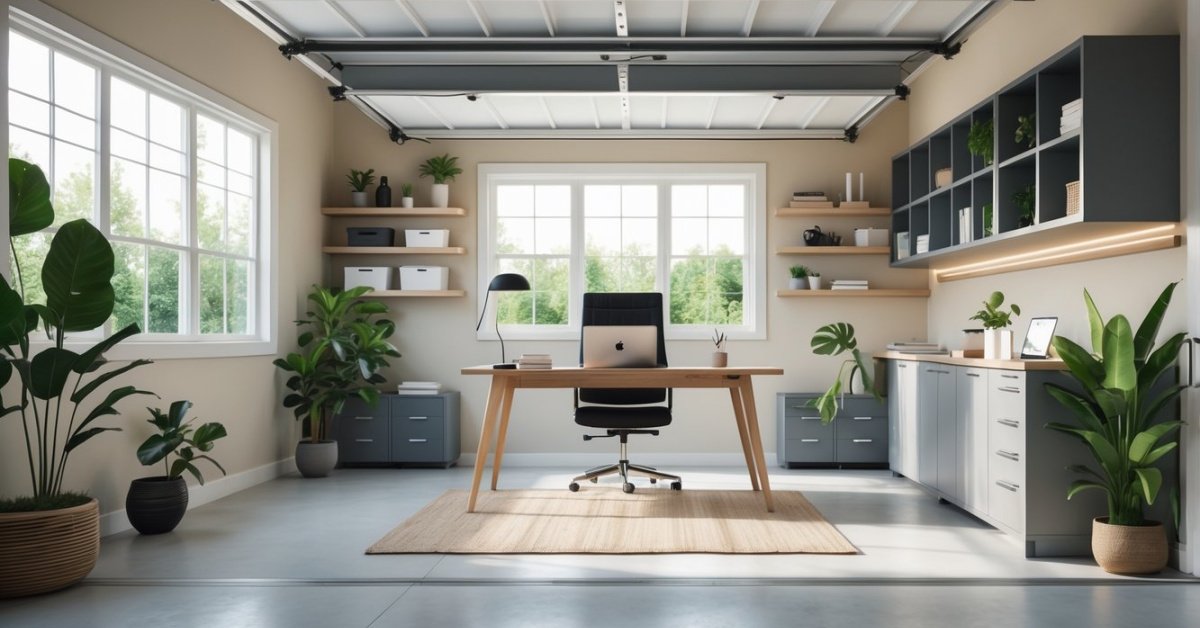
I’ve always dreamed of having a space where I could let my creativity run wild without worrying about making a mess. My garage, once packed with boxes and forgotten tools, started looking like the perfect blank canvas for a craft room makeover.
Transforming a garage into a craft room isn’t just about clearing space—it’s about creating a spot that inspires and keeps everything I need within reach. I love the idea of turning an overlooked area into a vibrant hub for my projects. If you’ve ever wanted a dedicated spot for painting, sewing, or scrapbooking, you’ll find that your garage has all the potential you need.
Benefits of Turning a Garage Into a Craft Room
Maximizing garage square footage for creativity creates a dedicated area that’s separate from living spaces. I see clients who use converted garages for crafts like quilting, woodworking, and jewelry making, which keeps clutter out of the house and centralizes project storage.
Enhancing craft room organization streamlines supply access, since wall-mounted shelves, custom cabinets, and pegboard systems help group materials. My projects often boost workspace efficiency by freeing up horizontal surfaces and labeling drawers for items like paints, tools, or ribbon.
Increasing property value with flexible garage conversions attracts future buyers. Homeowners report that finished, functional garage rooms can raise interest in listings, according to National Association of Realtors surveys.
Improving lighting and airflow supports longer, more comfortable crafting sessions. I upgrade old garages with LED task fixtures, ceiling fans, and windows for natural light, helping crafters reduce eye strain and enjoy fresh air.
Expanding sound dampening and mess containment provides peace of mind. Soundproofing panels and washable flooring allow activities like power tool use or messy art without disturbing households or creating permanent stains.
Supporting safety and accessibility benefits kids and adults. Features like anti-slip mats and adjustable-height worktables make crafting safe for all ages, especially in families where multiple generations share the space.
Planning Your Craft Room Transformation
I always start every craft room conversion with careful planning, since a solid foundation leads to a space that inspires creativity and functions efficiently. Before moving a single box, I look at layout, storage, and budget factors to create a vision that’s both practical and personal.
Assessing Space and Storage Needs
I assess the garage’s dimensions to define the work and storage zones first. I measure wall lengths and ceiling height, then note obstacles like water heaters or garage doors. I list craft activities (painting, sewing, scrapbooking) since each needs different surface heights or tool storage. I sketch zones for large worktables, cutting mats, or sewing machines. Then I add storage solutions based on available space, such as wall-mounted pegboards, vertical shelving for bins and fabric, and under-table cubbies for smaller supplies. Planning built-in cabinetry for infrequently used materials helps clear work surfaces. I always factor in electrical outlets and good lighting placement while mapping these plans.
Setting a Budget
I set a project budget by listing fixed and flexible costs. I calculate material costs for insulation, drywall, paint, and flooring, then add estimates for cabinets, shelves, and lighting fixtures. I allocate funds by priority, placing climate control, storage, and durable surfaces first, decoration second. If I spot savings in one area, I shift those dollars to better lighting or larger work surfaces. When clients want custom options, I offer product tiers and price each upgrade, then recommend a contingency reserve (10–15%) for unplanned expenses such as electrical rerouting or moisture control improvements. I always review local permit requirements and include those fees in my financial plan.
Essential Steps to Convert a Garage Into a Craft Room
Transforming a garage into a craft room involves practical upgrades and customizations that balance creativity with everyday usability. I always approach these projects by focusing on efficient planning and creative use of every square foot.
Insulating and Improving Climate Control
Upgrading insulation and adding climate control systems creates a comfortable environment year-round. I install fiberglass batts or spray foam between wall studs, and add weatherstripping to doors and windows, if the garage isn’t already sealed. I often recommend mini-split HVAC units for zoned temperature management in craft rooms, as these require no complex ductwork. I assess existing vents and add exhaust fans when projects involve fumes, glues, or paints. These improvements help maintain steady temperatures and protect art materials from humidity or extreme cold.
Flooring and Lighting Considerations
Selecting appropriate flooring and improving lighting boosts both functionality and aesthetics. I install epoxy coatings or vinyl planks over concrete for easy cleaning and durability. Mats or interlocking foam tiles soften standing areas near worktables. For lighting, I upgrade to bright LED fixtures and add task lighting over workzones with adjustable desk lamps or under-cabinet strips. I position windows or add glass-paneled doors, if possible, to boost natural light and reduce eye strain. These enhancements help craftspeople work in comfort and with better visibility.
Organizing Storage and Workspaces
Designing efficient storage and practical work areas maximizes usable space. I build custom shelving and close-fit cabinets for vertical storage, keeping supplies sorted and off the floor. I incorporate pegboards for tools and hooks for frequently-used items like scissors and tapes. I design moveable worktables with locking casters for flexible layouts, and I install deep drawers with dividers for organizing fabric, papers, or beads by color or size. I always anchor heavy storage pieces to studs for safety. Well-planned layouts allow crafters to find supplies quickly, keep projects organized, and clean up with minimal effort.
Choosing the Right Furniture and Supplies
Picking fitted furniture keeps a converted craft room functional and clutter-free. I usually select modular workstations with adjustable heights for sewing, painting, or assembly tasks. Wheeled worktables let you reconfigure zones for group projects. Sturdy tables with melamine tops resist paint and glue, making cleanup easy after a busy session.
Adding ergonomic chairs with lumbar support helps you work comfortably during long creative sessions. Stackable or foldable seating maximizes floor space when guests join in. Wall-mounted storage towers and multi-tiered supply carts hold specialty items like fabric rolls, paints, and small tools. I install freestanding cabinets for heavy-duty supplies and lockable drawers for sharp tools or adhesives.
For storage, I recommend clear stackable bins and labeled drawer organizers. Pegboards and slatwalls let you display scissors, rulers, and brushes within arm’s reach. Magnetic strips hold metal tools safely above the workspace. Pull-out vertical racks suit paper and canvas storage, keeping them flat and dust-free.
Task lighting and power-access furniture amplify function. I prefer tables with built-in power strips, USB ports, and cable management. Swing-arm lamps and overhead LEDs give focused illumination on detail work.
When planning supply inventories, I take measurements to ensure new furnishings and containers fit available wall and floor areas. Bulk-buying consumables like adhesives, paper, or fabric saves money but requires airtight bins to prevent spoilage or fading. I always prioritize furniture with easy-clean surfaces and rounded corners for safety in high-activity areas, especially in homes with children or pets.
Selecting the right mix of furniture and supplies creates a craft room that supports creative flow while keeping garage conversions organized, safe, and versatile for evolving hobbies.
Personalizing Your Craft Room Design
Personalizing a craft room design enhances both function and creative spirit. I always start by getting to know my clients’ crafting styles, since the way someone knits differs from how another person scrapbooks or builds models. Understanding which activities dominate helps me suggest the most space-efficient layouts and supply storage.
Selecting a color palette sets the mood. I recommend light, neutral wall colors—such as pale blues or clean whites—because they reflect natural light best and let art supplies or finished pieces stand out. For accent walls or cabinetry, vibrant shades like yellow or teal can inspire energy without overwhelming the senses.
Custom storage reflects personal craft specialties. I install dowel rods for ribbon spools, shallow drawers for beads, and deep cubbies for fabric bolts. Grouped open shelves display favorite supplies or inspiration pieces. Labeling containers and transparent bins boost work efficiency and make materials easy to find.
Decorating with personal touches supports motivation. I hang framed project photos, install corkboards for ongoing ideas, or showcase vintage tools. Rolling carts or compact trolleys display recent works in progress, keeping creative flow uninterrupted.
Furniture finishing choices influence the room’s character. I offer butcher block for a traditional look, high-gloss offsets for modern tastes, or stainless surfaces for crafters working with clay or paint. Adjustable lighting and task lamps help set the mood or spotlight detailed work.
Integrating technology elevates any craft room. I always recommend adding built-in charging stations, wall-mounted smart speakers, or a small screen for tutorials. These features keep digital tools handy without cluttering the workspace.
If the garage faces outside traffic or weather, I recommend insulated curtains and area rugs to increase comfort and personalize the feel. Including greenery with low-maintenance plants addresses air quality and brings a bit of life into the new creative hub.
Adapting each suggestion to the homeowner’s personality ensures every craft room design meets practical needs and inspires pride in the transformation.
Common Challenges and How to Overcome Them
Space limitations create obstacles when turning garages into craft rooms. I maximize every square foot by using vertical storage, such as wall-mounted cabinets, pegboards, and ceiling racks for off-season items like holiday supplies or seldom-used tools.
Temperature control proves difficult in many garages. I install quality insulation panels, seal door gaps with weatherstripping foam tape, and use ductless HVAC units or portable heaters, if electrical access allows. I select low-profile ceiling fans to keep air circulating evenly year-round.
Moisture or dust buildup threatens delicate craft supplies, especially in unfinished garages. I add vapor barriers or sealant to floors, use dehumidifiers during humid seasons, and select enclosed storage containers with locking lids for items like fabric or paper.
Lighting often falls short for detailed projects. I install daylight-balanced LED fixtures above workspaces, add adjustable task lamps at stations for close-up work like beading or model building, and use under-cabinet strip lighting for shadow-free illumination.
Electrical needs grow with craft tools and devices. I consult licensed electricians to add grounded outlets at each workstation, install cord organizers or power strips with surge protection, and ensure the electrical panel meets expanded demand.
Noise or fumes, especially from power tools or paint, impact comfort and safety. I apply weatherstripping for basic soundproofing, hang acoustic panels on shared walls, and use window exhaust fans or filtered air purifiers for ventilation.
Budget overruns happen if owners underestimate costs. I track purchases in a spreadsheet, prioritize essentials like insulation and storage, and recommend DIY-friendly upgrades such as self-installed floor tiles when the budget is tight.
Security concerns arise when storing valuable crafting equipment. I recommend keypad locks for exterior garage doors, motion sensor lighting, and interior cabinets with locking doors for expensive or dangerous tools.
Access for all ages or abilities matters most in multigenerational homes. I add slip-resistant flooring, install wide walkways between furniture, use open shelving at accessible heights, and select lever-style handles for easier grip on storage units.
Conclusion
Turning my garage into a craft room has opened up a world of possibilities I never expected. Every step of the journey has taught me how much a dedicated creative space can spark new ideas and make projects more enjoyable.
If you’re thinking about starting your own transformation just know it’s worth every bit of effort. There’s something truly special about having a place that’s designed for creativity and tailored to your needs. I can’t wait to see what you’ll create in your own craft room!


